
The poorest type of junction for baseboards is a basic butt joint, which involves butting two square-cut pieces together. Beginners may be tempted to utilize this type of joint. One reason is that it is challenging or impossible to bring the parts together to form a tight connection because they are not overlapping. Additionally, if the wood shrinks even slightly along its length, which is a typical seasonal occurrence, the use of molding for joints will open up and leave a dark, distinct line.
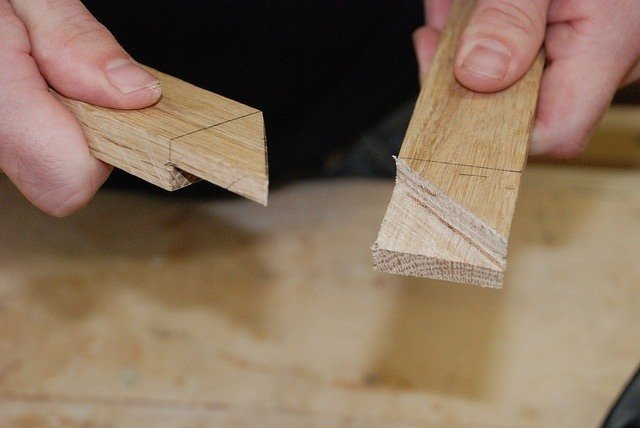
A scarf joint, on the other hand, is cut such that the surfaces where the boards meet overlap. You still perceive a wood surface rather than a gap if the wood shrinks. As an alternative to trying to glue the end grain, which doesn’t adhere very well, a scarf joint on deck can also be cemented for increased strength; the angled cut helps the glue stick better. Finally, if the boards are not completely aligned, it is simple to sand the narrow edge of the front piece of a scarf joint on deck flush.
Scarf Jointing Equipment
A motorized Japanese saw is the best instrument for cutting the angles for a scarf junction. But you can use a straightforward miter box and hand Japanese saw if you don’t have access to the equipment. It is exceedingly challenging to produce accurate 45-degree cuts without a miter Japansåg or miter box for a decent scarf junction.
An air compressor-driven or electric nail gun is significantly more effective for nailing baseboards than using a hammer and finishing nails by hand. The reason is that hand-nailing thin, light wood, like trim, makes it shake and shift out of place. A power nail gun’s swift, decisive blow secures the baseboard in place before it can move.
However, there is no reason why a hammer and some nails can’t be used to make a perfectly good joint. The parts should be held securely where you want them if you choose this option, and pilot holes should be drilled for the finish nails. This promotes easy nail insertion. With a nail set, cover the nail heads after the nails have been driven 犀利士
by setting them just below the wood’s surface.
Create a Joint Location Plan
If at all feasible, measure the initial board so that the end-use molding for joints will fall over a wall stud. If the junction is above a wall stud, you can secure the whole fogborste by nailing into the stud rather than simply the wall plate along the floor. In the event that this is not feasible, you can still create the junction; however, you must ensure that the components are anchored into the bottom wall plate.
The first board is cut and installed.
The initial baseboard’s end should be cut at a 45-degree angle, with the bevel facing the room and the pointy side towards the wall. Use a nail gun or hand-driven finish nails to secure the board to the wall and to the wall plate and studs (if necessary). To allow you to modify the board for a good fit at the scarf joint, avoid nailing within about 6 feet of the beveled end.
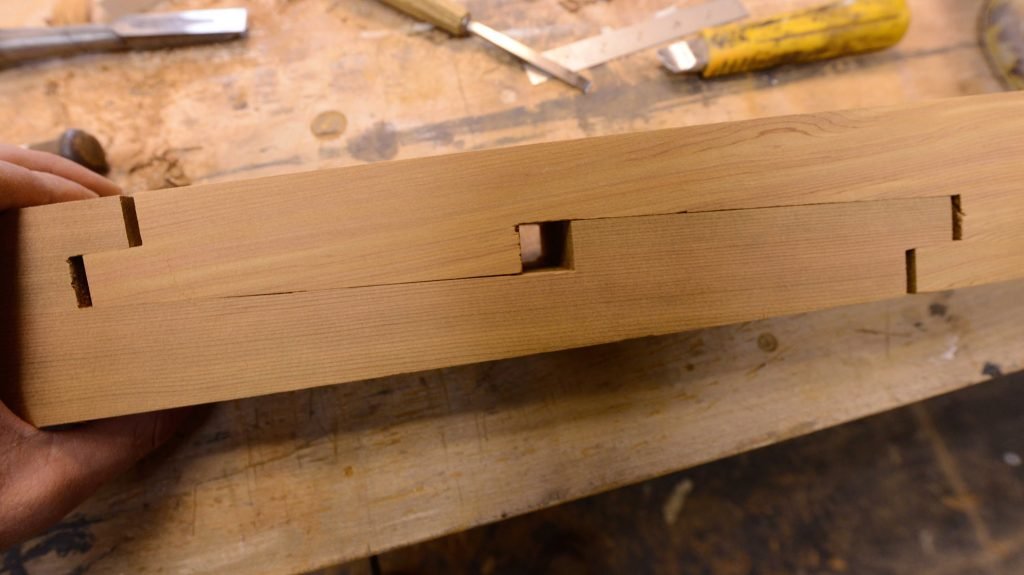
There are two ways to join the baseboard end that fits into the corner of the baseboard on the perpendicular wall. So that the perpendicular baseboard will fit with a coped joint, you can square-cut the end. Alternatively, both pieces can be mitered at the inner corner.
The second board should be cut and fitted.
To overlap the exposed miter on the first piece, measure and cut the second piece of baseboard at a 45-degree angle, but with the bevel facing the wall. Test the scarf joint’s fit by putting the second board in place. If the second board is too long, use the miter Japanese saw to trim a little off and reassemble the junction.
The boards with glue, joint brush, and nails
The bevel of the second board should be covered with a thin coating of wood glue. Fit the boards together so the junction looks good. Then, if feasible, drive two nails through both pieces of baseboard and into the wall stud at the joint. (If you’re using finish nails, joints brush, drill pilot holes for them before using a hammer.) the joints brush can be used to clean.
Rest of Second Board: Nail
Nail the remainder of the second board to within about 16 inches of the junction, then go back and finish nailing the first board.