
How to draw male curly hair: Hair isn’t easy to style at the best of times, and when you add an element like curls, it can be even harder! With all the different types of hair you can find, learning to draw curly hair can be pretty tricky! Luckily, it’s only hard if you don’t have to follow the proper steps.
You can learn awesome drawing ideas. This guide you’re in will show you everything you need to know to do just that! We hope you appreciate this step by step tutorial on how to draw curly hair in just 6 easy steps.
How to draw male curly hair Let’s start:
Step 1
For this first step in our tutorial on how to draw curly hair, we’ll start with the outline of the hair itself. To do this, we’ll create a curved line with many bumps. These lines form the sides and top of the hair. You can also start by using a pencil to draw a circular shape where the face will be so you can reference where the hair will go. If you’re happy with the look, you can move on to the next step!
Step 2
We will add the face outline and complete the inner hair design for this second step of your curly hair. First, use a rounded line with a point for the chin down to create the bottom of the face. Once you have drawn this lower part of the face, you can extend the jagged line used for the top and sides of the hair into the inner part of the head. With that, the outline is complete, and we’ll add some more details and details in the following steps.
Step 3
We have the outlines of the face and the head, and in this part of our curly hair drawing guide, we will add the ears and the shoulders. The ears are drawn as oval shapes on the side of the head where the hair attaches to the face. Then you can add rounded lines inside the ears to show their internal structure.
You can draw rounder shapes under the chin when you are done with the ears. This will help shape the boy’s neck and also the collar of his shirt. Finally, for this step, carefully draw straight lines from the neck to create the shoulders and sides of his chest.
Step 4
This curly hair design is already taking shape! For this part, you’ll draw the boy’s face and arms before moving on to the final details.
First, use ovals for the eyes and smaller dots for the pupils. You can then use a few simple lines to create the boy’s eyebrows, nose, and mouth.
Then, when you’re happy with the face, you can use straighter lines to draw the sleeves of his shirt. Finally, you can finish by pulling his arms out of his sleeves.
Step 5
This fifth step of our curly hair drawing guide is to add the final details before coloring it. These details are primarily found in the hairline itself and help the hair look beautiful and curly. These details in the hair are drawn with many small curved lines connected.
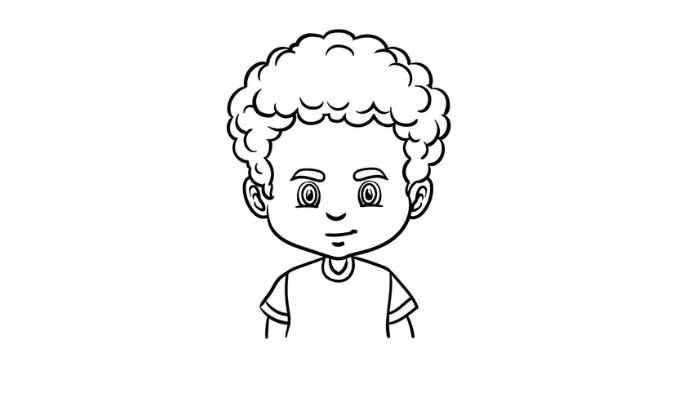
Once you’ve added those details, you’re ready for the next step! Before moving in, you can also provide own information that you want. You can change the boy’s facial expression for an idea or add a great design to his shirt. You can also enlarge or reduce the outline of her hair according to your preference. These are just a few ideas you could try, but there’s more you could do! What do you think of this picture?
Step 6
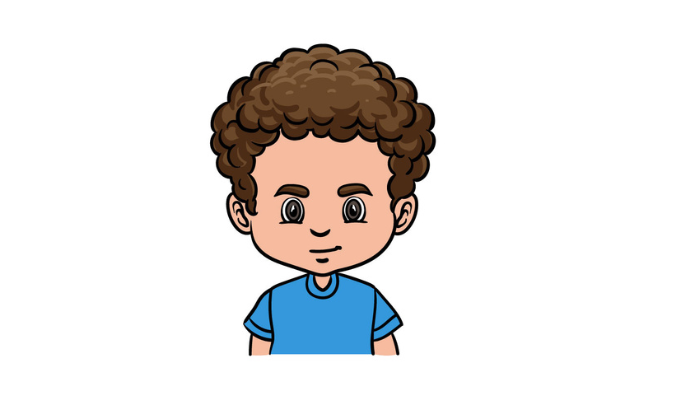
Stage 6 of this guide is the last and most fun! In our reference image, we used a few shades of brown for the hair while we used a lovely blue for the shirt. We chose these colors, but feel free to use any colors you like! Hair can come in various styles and colors, so you can use whatever you want to fill it in.
Once you know how to color your curly hair design, you can start playing with your favorite mediums and art tools. What paints and art supplies do you plan to bring this drawing to life with color?
Learn more: draw male curly hair